Showing posts with label food. Show all posts

Monday, February 23, 2015

Snack Attack

I would definitely be okay with living off of appetizers.
Everything tastes better when it's mini and made into a dip anyway, right?

Which leads me to the reason for this post: Spinach and Artichoke Dip and Jalapeño Poppers.

Before I get into the recipes, I have a confession to make...
Although I made these for us to enjoy on Superbowl Sunday, we didn't actually watch the Superbowl, per se... whoops. In my defense, the food is the best part anyway and we had a lot of shows on the DVR to catch up on! I know, I know...next year for sure.

Whatever the occasion, both of these recipes are sure to please and easy to make!

For the Jalapeño Poppers, you will need:

- WHOLE jalapeños (as many as you want, I had 6 wish made 12 poppers)
-cream cheese
-bread crumbs

Preheat your oven to 350 degrees F. Wearing gloves, cut the top (stem) off each jalapeño and then cut each in half lengthwise. Next, filled each half with cream cheese and rolled them in breadcrumbs. Place on a baking sheet and bake for about 25 minutes. That's it!

Warning: These turned out too spicy for me to eat more than one :( but the BF loved them! It depends on how spicy the jalapeños you buy are, but you may want to try this with a slightly milder pepper if you're a wuss like me.


For the Spinach and Artichoke Dip, you will need:

-1 8oz. container of cream cheese
-1/2 cup plain greek yogurt
-1/2 block of sharp cheddar cheese (about 4 oz.) + another 1/4 of the block (about 2 oz.)
-1/2 tsp. black pepper
-1 tsp. garlic powder
1 can of artichoke hearts (drained and chopped)
-1 cup of packed frozen spinach (thawed and squeezed dry)

Preheat your oven to 350 degrees F. Mix all ingredients in a bowl (except the extra 2 oz. of cheese - that's for the top). Spread the mixture in a pie pan or other shallow baking dish and sprinkle remaining cheese on top. Bake for about 30 minutes. Serve with tortilla chips, pita chips, or crackers.


Side Note: We basically ate this entire dish of dip in one sitting...it's that good. Also we're gluttons for snack foods. 

Monday, June 9, 2014

Quick and Easy Veggie Sammie and Gluten-free Brownies

Hi Everyone! Just a quick post today for a "recipe" I made for lunch over the weekend. This veggie sammie is super simple, so I wasn't going to blog about it originally, but so many people mentioned how it inspired them to eat something a little healthier this past weekend, so I thought I should post it on here!

I use the term "recipe" loosely because hello, this is sandwich, not rocket science, you can literally put whatever you want on it.

This is what I choose:

-homemade hummus
-organic tomatoes
-organic cucumbers
-organic spinach
-organic arugula 

I layered all those yummy (and consequently, vegan) goodies onto whole wheat bread. I may have eaten some goldfish crackers with it... nobody's perfect.

Here's the proof:


I also made some gluten-free brownies this weekend for some co-workers (and myself...). The recipe uses black beans instead of flour and can be found here. They are SO good and no, they taste nothing like black beans. Give them a try if you don't believe me (they are also very easy to make), and before you tell you boyfriend/husband/neighbor/bff/whoever what's in them, let them taste for themselves.


Here's how mine came out:

Chocolatey Goodness


Please leave a comment and thank you for stopping by! :)

Friday, May 30, 2014

Spinach Shrimp Quesadillas


 Some of the most delicious meals can be made from fridge leftovers.


Quesadillas are especially good for leftover concoctions. You can literally put anything in them. We had shrimp and spinach in the freezer, so I went in that direction. It was a good decision for a Friday night quickie dinner. 

Here is what I used, but like I said there are many variations:
-1/2 a white onion, chopped
-1/2 a jalapeno, chopped 
-shredded cheddar cheese
-flour tortillas
-shrimp, thawed and patted dry
~1/3 cup chopped (frozen) spinach
-a dash each of: cumin, chili powder, salt and cilantro 

Directions: 
In a small pan, saute the onion, jalapeno, spinach and spices in olive oil. Then add in the shrimp and cook for another minute. In another pan, (NOT oiled) place a tortilla. Turn it on medium-low. Put cheese on the tortilla, and then spoon some of the filling you cooked on top. 

Cover with another tortilla. Cook for about 5 minutes (or until slightly brown on bottom) and then carefully flip over with a spatula. Cook for another 5 minutes. 

Eat! 


Monday, May 26, 2014

Buffalo Chicken Wraps and Homemade Potato Salad


Happy Memorial Day! It is FINALLY beautiful here in New York and I am officially ready for it to be summer!

All this nice, warm weather puts me in such a good mood! 8-) It's one of the many reasons we're moving to Florida (in exactly one month tomorrow!) I can't wait to live in a place with amazing weather more than 3 months out of the year. That being said, I will miss summertime in NY - so far it's the only thing I can think of that I'll miss! (Except our friends and family, of course!)

In honor of this lovely 3-day weekend and my upbeat attitude, here are the recipes for our dinner tonight - Buffalo Chicken Wraps (made in the Crockpot), and Red Potato Salad.

The Chicken is EXTREMELY easy to make.

Ingredients:
- 2 chicken breasts (I used frozen organic)
- ~1/2 cup buffalo sauce (I used Sweet Baby Rays)
- thin cut carrot sticks and celery sticks
-tortillas
-lettuce
-blue cheese crumbles

Directions:
Place the chicken and sauce in the Crockpot for about 4 hours on high (if frozen). Shred the chicken with 2 forks and mix around in the sauce.
Build your wrap. You can add whatever you'd like, but I recommend a few carrot and celery sticks, a leaf of lettuce, and some blue cheese crumbles.


For the potato salad, you will need:
- 6 red potatoes, scrubbed and cut into chunks
- ~ 1 tsp. mustard
- ~1 1/2 tsp. white vinegar
- ~ 1 tsp. red wine vinegar
-salt and pepper to taste
- ~ 1/2 tsp. dill
- ~ 1/2 tsp. garlic
- ~ 1/2 cup plain greek yogurt (or mayo if your prefer)
- ~1/4 tsp. paprika (I used smoked)

Directions:
I'd be lying if I said I actually measured any of these ingredients (I rarely measure when cooking, but ALWAYS when baking). That being said, I gave you some approximations, but it's salad not rocket science, so feel free to add or subtract as you see fit.
First, cook the potatoes in just enough water to cover them, on medium-high for 20 minutes. As soon as they are soft when poked with a fork, they're done. Let the potatoes cool, or use cold water to cool them off. Make the sauce while they cool.
Mix all the remaining ingredients together. Then mix with the potatoes. Cool in the refrigerator for about an hour.


Thursday, May 22, 2014

Chicken Tikka Saag


Today, I took the day off work to go to a doctor appointment, which I thought would mean I'd have the other 7 hours of my day to lounge around.
I was way off. Somehow, having a day off to relax suddenly turns into 'chore day'. #bummer.
So, I did laundry, cleaned, went to visit some old co-workers, went to my check-up appointment, aaaaaanndddd made Indian food in the Crockpot for dinner! :)

So here it is! My first attempt at making Chicken Tikka Saag (in the Crockpot)!
From what I understand, 'saag' means spinach and 'tikka' just means little pieces, so basically this recipe is chicken with spinach and some 'Indian' spices.

Ingredients: (Serves 2)
-1 large chicken breast (I used frozen)
-2 cups frozen chopped spinach
-1 cup chicken stock (which I made using 1 tsp. Better Than Bouillon + 1 cup water)
-1 small onion, chopped
-1/2 tsp. chili powder
-1/2 tsp. coriander
-1/2 tsp. cumin
-1/2 tsp. crushed garlic
-1 tsp. garam masala (which is an Indian spice mix)
-a few turns of the black pepper grinder (to taste)


Directions:
Throw everything in the Crockpot, (liquids and chicken first), then cover and set to low for about 8 hours. Shred chicken. Serve with rice.


*Notes* 
This is a very healthy dish, however that to me, makes it taste slightly less authentic in a way. Next time I make this, I might try using some olive oil or coconut milk, to give it a little creamy nudge.

Also, I'm just now realizing that this a very frugal meal to make, which is awesome! I'm thinking about adding price approximations to the meals I make from now on! :)

I hope you try this recipe! Enjoy!


Friday, February 28, 2014

I haven't forgotten you!


Sadly, being a full-time teacher doesn't leave much time for part-time homemaking and blogging.
The amount of work I have to do this weekend is totally absurd for a person who teaches 6-year olds. I really don't understand the public school system sometimes.
Alas, I will blog foodie things again when I get the chance...probably not for about another 2 weeks :(


In other news, we took a week long trip to Belize over the winter break and it was AMAZING. Especially considering how much we like food. When I get the chance I will be attempting to recreate some of the food we ate while we were there!


Hasta luego Blog...see you in a few weeks....


PS, here are 2 pictures from Belize! Go there if you can! It's beautiful and delicious!


sunset

Monday, February 3, 2014

Balsamic Veggie Wraps

With (optional) chicken and rice! 

Sometimes, the simplest meals can be the most satisfying. This weekend, I had a craving for a grilled veggie wrap, mostly because I'm longing for summer hardcore. There was another snowstorm here today (which I had to drive to work in) and I was beyond angry about it. For me, cooking and baking have become more and more of a de-stresser. I like that I'm able to do something I like, while also feeding my family (aka my lovely boyfriend), and of course it's nice that he's always so appreciative (even when I mess up..oops!).

Ready to wrap! 


Finished veggie/chicken mixture
ANYHOO! Here's the recipe! It's perfect for a quick weeknight meal or even a weekend lunch. Enjoy! :)
Ingredients:
*Note* - This will cook faster if you use frozen veggies (ironically enough), but fresh are of course good too. And you can use basically any mix, these are just the veggies that I had on hand. And the measurements are approximate, depending on how many people you are cooking for (and how big their appetites are....). I also "eye-ball" measurements a lot when cooking, so use your own judgement for this.
~1/2 cup bell peppers, thin sliced
~1/2 cup thin cut carrots sticks (see photos)
~ 1/4 cup leeks, sliced
~1/4 chopped spinach
~ 4-5 button mushrooms, sliced
lettuce (for garnish)
~1 tomato (for garnish)
~1 tablespoon olive oil
~ 2 tablespoons balsamic vinegar
a few shakes of salt, pepper, and garlic powder
1 chicken breast (if you want - still really good without it!), cut into thin strips
brown (or any other kind) rice, to eat on the side
tortillas


Directions:
1. First I start making the rice, since it takes the longest to cook. I made brown rice on the stove top.
2. I cut up any veggies that need to be cut (some were frozen and pre-cut), into small, longish pieces.
3. I cut up the chicken into small, longish slices. Then I cooked the chicken in olive oil, a large skillet on the stove.
4. When the chicken is cooked, I take it out ( or move to the sides of the pan), add a little more oil, and cook the veggies. Add the salt, pepper and garlic now too. It took about 15 minutes total.
5. I add the chicken back and the balsamic vinegar when the veggies are almost done. Cook until the veggies are as crisp or not-so-crisp, as you'd like them.
6. Scoop mixture onto a tortilla. Add tomato and lettuce if you want. Attempt to wrap it up. (This part never works out for me). Serve rice on the side.
7. EAT! :)


I hope you try and like this recipe! Please sign up for email updates if you like what you see! You can also follow my blog on Google+ if you have a Gmail account!

All wrapped up with a side of rice! 
~Mallory~

Wednesday, January 22, 2014

Homemade Cinnamon Raisin Granola Bars


I have been wanting to try to make my own granola bars for a while now, but haven't been able to find a recipe I liked. This one is a mix of a few I found on the interwebs.
Forgot to take a "before" picture, but here they are in the oven! 
Ingredients: 
2 tablespoons (softened) unsalted butter
1/4 cup + 2 tablespoons unsweetened applesauce
1/2 cup brown sugar
1 tsp. honey
1/2 tsp. vanilla extract
1/2 tsp. baking soda
1/2 cup white whole wheat flour (or all-purpose)
2-1/4 cups rolled oats
1/4 teaspoon cinnamon
1 cup raisins (or other dried fruit of your choosing)

Directions:
Preheat the oven to 325 degrees F. Spray a 13x9 (or similar size) pan with olive oil or cooking spray.
Combine the butter, applesauce, brown sugar, honey, vanilla and flour by hand or with a hand mixer (I have a lovely purple hand mixer I use every chance I get).
Add the baking soda, rolled oats and cinnamon. Mix again.
Stir in the raisin with a wooden spoon.
Pour mixture into the pan and spread evenly with the  wooden spoon.
Bake for 20-25 minutes, or until edges are brown and top is golden. (see photos).

How freaking delicious do these look!? This is right out of the oven, pre-cutting. 
I'm glad I finally got around to making these! They came out so good and we're ridiculously easy to make. The whole thing probably took about 10 minutes, including clean up (but not baking time). I let them cool for about 30 minutes before I cut them into bars, and wrapped them up for easy breakfast grabbing.


Give them a try and let me know what you think!

Mallory :)

Saturday, January 18, 2014

Chocolate Coconut Crinkle Cookies

Hello again!
I know I said I'd be posting mostly "healthy" recipes and DIY things, but turns out most of my recipes are dessert related...
I like to think these cookies are fairly healthy as far as cookies go, since they are made with coconut oil instead of butter, and cocoa powder which I keep telling myself is in the health-food category. They also happen to be vegan! I didn't intend for them to be, there just happens to be no dairy in them. Don't get me wrong, I like dairy as much as the next 'Merican (most notably cheese), but it really is not good for you, like at all, so it's nice to unintentionally eat vegan once in a while.
So here's the recipe!

Ingredients: 
1 3/4 cups sugar (I used organic)
1 cup cocoa powder
1 cup applesauce
1/2 cup coconut oil (I used organic)
2 tsp vanilla
2 1/4 cup flour (whole wheat or all-purpose)
2 tsp baking powder
1/4 tsp salt
powdered sugar for rolling

Directions:
Mix sugar, cocoa, applesauce, oil and vanilla in a large bowl. In a separate bowl, whisk together the flour, baking powder and salt. Add the flour mixture to the wet ingredients and blend with a hand mixer. Put the mixture in the fridge for at least 2 hours or overnight. (This allows the coconut oil to harden enough to make dough balls).

Preheat oven to 350℉. Pour powdered sugar in a bowl. Take dough out of fridge. Roll dough into small meatball-sized balls. Roll balls in sugar. Place on cookie sheet. Bake for 10 minutes. Cool on cooling rack. 


On the cookie sheet ready to be put in the oven!


I brought some of these to work around Christmas time and everyone loved them! The coconut flavor is subtle to me, but if you absolutely hate coconut, then use another kind of oil. Also, you probably won't like this blog because I'm kind of obsessed with coconut things. My boyfriend is still undecided about the whole coconuts taking over the grocery story thing, but he really loved these cookies. Like I said, the coconut flavor is subtle. 
I hope you try them! :) 


Fresh out of the oven! They smell amazing!

Sunday, January 12, 2014

French Onion Soup (In the Crockpot!)


A few months ago, I found this recipe for French Onion Soup (made in the Crockpot!) on Pinterest. I had to change it slightly (I didn't have enough beef stock - oops!) But it still came out delicious!
I'll post my slightly edited version of the recipe or you can use the link above. It was very easy, but has a few more steps than most Crockpot recipes, so it's best to save for a weekend day.
Enjoy! :)

INGREDIENTS
¼ cup (1/2 a stick) unsalted butter
4 medium onions, halved and thinly sliced
2 tsp. crushed garlic (we always have some in the fridge)
2 tablespoons balsamic vinegar
2 tablespoons brown sugar
½ teaspoon salt
3 tablespoons flour
1 can beer
2 cups beef stock
~1/2 cup water if needed
1-1/2 teaspoons dried thyme
½ teaspoon pepper
bread, rolls, or crutons (we had leftover rolls I used)
Shredded Gruyere and/or Swiss cheese

DIRECTIONS
Turn on your slow cooker and set to high. Add butter and let melt. Add onions, garlic, vinegar, brown sugar, and salt. Mix well. Cover and let cook for 1-1.5 hours, stirring every 15 minutes, until onions begin to turn brown. Stir in flour, allow to cook for a couple minutes then stir in beer and beef stock and water a bit at a time, stirring well between each addition to avoid lumps. Stir in thyme and pepper. Cover and cook for 6-8 hours on low. Taste and season with additional salt, if desired.
To serve: Top with cheese and serve with bread either on top or on the side. (Our rolls didn't fit well in the soup...)


Saturday, January 11, 2014

Bacon is an addiction I have

BACON. mmm.

Sooooo, I know I just posted an organic juice recipe, but while I was doing that, there was bacon cooking in my oven. (Hey, nobody's perfect). Anyhoo, as I was taking it out of the oven, I realized how the cooking method I started using is so much easier than pan frying, not to mention it's a lot less messy, and the bacon comes out flat and perfectly crisp every time! (The proof is in the pictures).

Here are the steps I take when cooking bacon:
1) Put foil on a cookie sheet.
2) Put a cooling rack on top of the foil. (See photos)
3) Place bacon slices on cooling rack.
4) Place pan in cold oven, on the bottom rack. (no pre-heating!)
5) Turn oven on to 400 degrees F.
6) Set timer for ~20 minutes. (I left mine in for about 23 minutes.)
7)When it looks crisp enough for you, take it out. You can let it cool on a plate if you want, or taste a piece immediately like I did. Fair warning, you might burn your tongue doing this.


This is definitely my preferred method for bacon cooking, and once you try it, I'm sure it will be yours too.

Friday, January 10, 2014

Why I eat organic produce

Why I eat organic produce

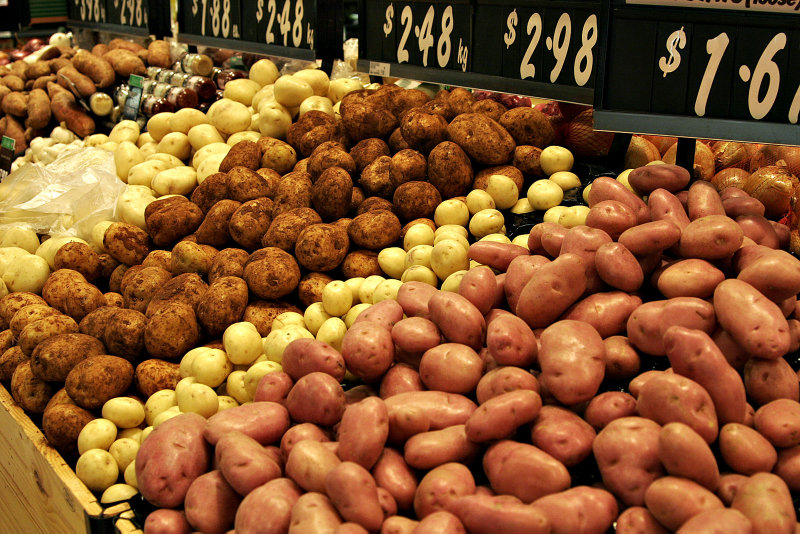
Click the link to watch a video about a third grader and her unintentional organic science experiment. She basically explains why I try to eat organic whenever possible. Sorry I couldn't post the video right in the blog :( But here's a picture of potatoes for you to look at!